Viral Hooks
Trending short videosDIY vintage afterhood sweatshirt tutorial
C

@crust_young

TikTok · Vlog

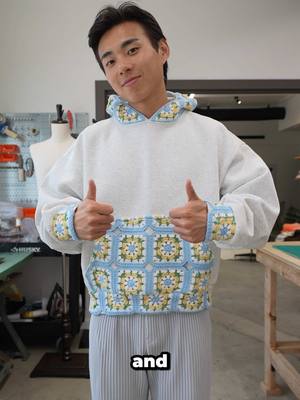
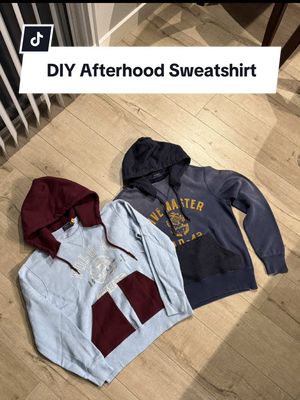
@crust_young How to make an afterhood sweatshirt! I love the look of these 1940s and 1950s sweatshirts. The split pockets, the contrasting colors, and the open neck on the hood make them the ideal hoodie imo. The process is relatively simple, and a perfect way to upcycle some old sweatshirts you don’t wear anymore! Sewn on to a beautifully faded @Ralph Lauren crewneck sweatshirt! #upcycling #vintagefashion #sewingtiktok #sewingtutorial #hoodie

View original on TikTok

The edit1 shot · 7 text
Shots Text1:28

Performance

Views
613.4K
Likes
63.6K
Comments
120
Engagement
10.4%
Outlier
5.7×
Length · 20 Jan 2025
1:28

Video #6345 · Vlog

DIY vintage afterhood sweatshirt tutorialfrom @crust_young

[01]

Overview

The creator provides a step-by-step tutorial on how to create a vintage-style 'afterhood' sweatshirt. He begins by showing how to deconstruct an old hoodie by removing its pocket and hood with a seam ripper. He then demonstrates how to attach the pocket and the prepared hood onto a separate crewneck sweatshirt, providing tips on pinning, sewing with a twin needle, and reinforcing the seams for durability, before showcasing the final upcycled garment.

[02]

Simple outline

  1. 1State transformation objective
  2. 2Demonstrate deconstruction phase
  3. 3Share an insider technique
  4. 4Show the assembly process
  5. 5Reveal the final result

[03]

Related videos

[04]

Classification

Format
Concepts
Tutorial / How ToProcessValue Vlog
Elements
VoiceoverText OverlayOverhead ShotB-Roll Cutaway

[05]

Hook analysis

What stops the scroll in the first 3 seconds

Title hook · 35%

TAKE AN OLD

Verbal hook · 50%

How to take an old hoodie and a crewneck and make it into an after hood sweatshirt.

Visual hook · 15%

The creator holds up two separate sweatshirts on hangers, one in each hand, immediately establishing the 'before' state of the DIY project.

[07]

Hook and payoff

The promise the opener makes, and how the video pays it back

Hook

A direct statement of the video's purpose, promising a specific, desirable transformation from a starting state to a finished state.

Payoff

The visual reveal of the fully transformed object, proving the success of the process and satisfying the viewer's curiosity.

[08]

Narrative framework

The structural pattern this video runs on

Framework

The Transformation Tutorial

A step-by-step guide that transforms one or more source items into a new, more desirable final product. The narrative is structured around key construction milestones and punctuated with expert tips to build authority and provide extra value.

  1. 1

    The Transformation Promise

    Clearly state the 'before' and 'after' of the project, setting a clear goal for the viewer.

  2. 2

    The Careful Deconstruction

    Show the process of taking apart the source materials, emphasizing a specific tool and the need for precision.

  3. 3

    The Design Fork

    Present alternative creative choices or paths the viewer could take, before committing to one for the demonstration. This establishes expertise and viewer agency.

  4. 4

    The Insider's Hack

    Inject a non-obvious pro-tip that solves a common problem or simplifies a difficult step, providing immediate value beyond the basic instructions.

  5. 5

    The First Build Milestone

    Demonstrate the assembly of the first major component, marking a significant point of progress in the transformation.

  6. 6

    The Polishing Pass

    Show a refinement or reinforcement step that improves the quality and durability of the work, signaling a high standard of craftsmanship.

  7. 7

    The Second Component Prep

    Isolate and prepare the next major component for assembly, using a distinct set of techniques from the first component.

  8. 8

    The Final Assembly

    Show the final and most crucial assembly step, often with specific guidance on placement and technique to ensure success.

  9. 9

    The Grand Reveal

    Present the finished product in its entirety, showcasing it from multiple angles to deliver the visual payoff promised in the hook.

  10. 10

    The Context & Commerce Close

    Provide broader context for the finished product (e.g., its style, history, or use case) and conclude with a clear call to action.

Themes

  • sustainability
  • creativity
  • upcycling
  • vintage style

Techniques

  • sewing
  • deconstruction
  • garment modification

Trends

  • DIY fashion
  • thrift flipping

Post caption

How to make an afterhood sweatshirt! I love the look of these 1940s and 1950s sweatshirts. The split pockets, the contrasting colors, and the open neck on the hood make them the ideal hoodie imo. The process is relatively simple, and a perfect way to upcycle some old sweatshirts you don’t wear anymore! Sewn on to a beautifully faded @Ralph Lauren crewneck sweatshirt! #upcycling #vintagefashion #sewingtiktok #sewingtutorial #hoodie

Text overlays

  • contextual · beginning

    TAKE AN OLD

  • contextual · beginning

    A CREWNECK

  • contextual · beginning

    AFTERHOOD

  • contextual · beginning

    FIRST THING

  • contextual · beginning

    TAKE OFF THE FRONT POCKET

  • contextual · end

    YOUR FINAL RESULT OF AN AFTERHOOD HOODIE.

  • call-to-action · end

    I MADE TWO OF THESE AND THEY'RE GOING TO BE ON SALE ON MY INSTAGRAM RIGHT NOW.

Transcript

How to take an old hoodie and a crewneck and make it into an after hood sweatshirt. The first thing you need to do is using a seam ripper, take off the front pocket and the hood of the old hoodie. Take your time with this. You don't wanna accidentally rip the pocket or the hood. Next, you're gonna wanna block out where everything goes. For the front pocket, you can either do one of these big ones or these split pockets, which I think are really cool. For this one though, I am gonna do the big front kangaroo pouch and a little hack for pinning it into place. Put a piece of hard plastic inside the hoodie no that way your needle doesn't accidentally go through the other side. Now using a twin needle, I'm just gonna sew the pocket down. And when you're finished, you might have some leftover fabric on the inside of the pocket. This is super easy with sweatshirts. You can just go right in and cut all that off. You don't have to worry about it fraying. Now it looks way cleaner. Here's how the front pocket looks right no, but I'm also gonna gonna do one thing by the opening of the pockets. On these corners, I'm gonna go back and tack down some extra thread. Just strengthen up those areas because they see a lot of use. Moving to the hood, I'm gonna take a bunch of these clips and then I'll turn the raw edges of the hood fabric in on itself, pin it into place, and iron everything down. Now switching back to a single needle on my machine, I'm gonna do a very basic straight stitch right across the bottom of the hood. This is what it will look like when you're done. And now we pin the hood into place on the body of the sweatshirt. One thing to note here, the end of the hood should actually go below the collar of the sweatshirt. Here's a better look for reference. And then with the hood centered and everything pinned into place, I'm gonna do a straight stitch twice across. One above the stitch we just made and then one below. So in the end, you should have three stitches across your good. And that's it, here's your final result of an after good hoodie. I love the style of those 1940s 1950s sweatshirts and if you don't want to make one yourself, I made two of these and they're gonna be on sale on my Instagram right no.

DIY vintage afterhood sweatshirt tutorial | Viral Hooks