Viral Hooks
Trending short videosDIY dollhouse renovation process video
K

@kylewilliamdesign

Instagram · Vlog
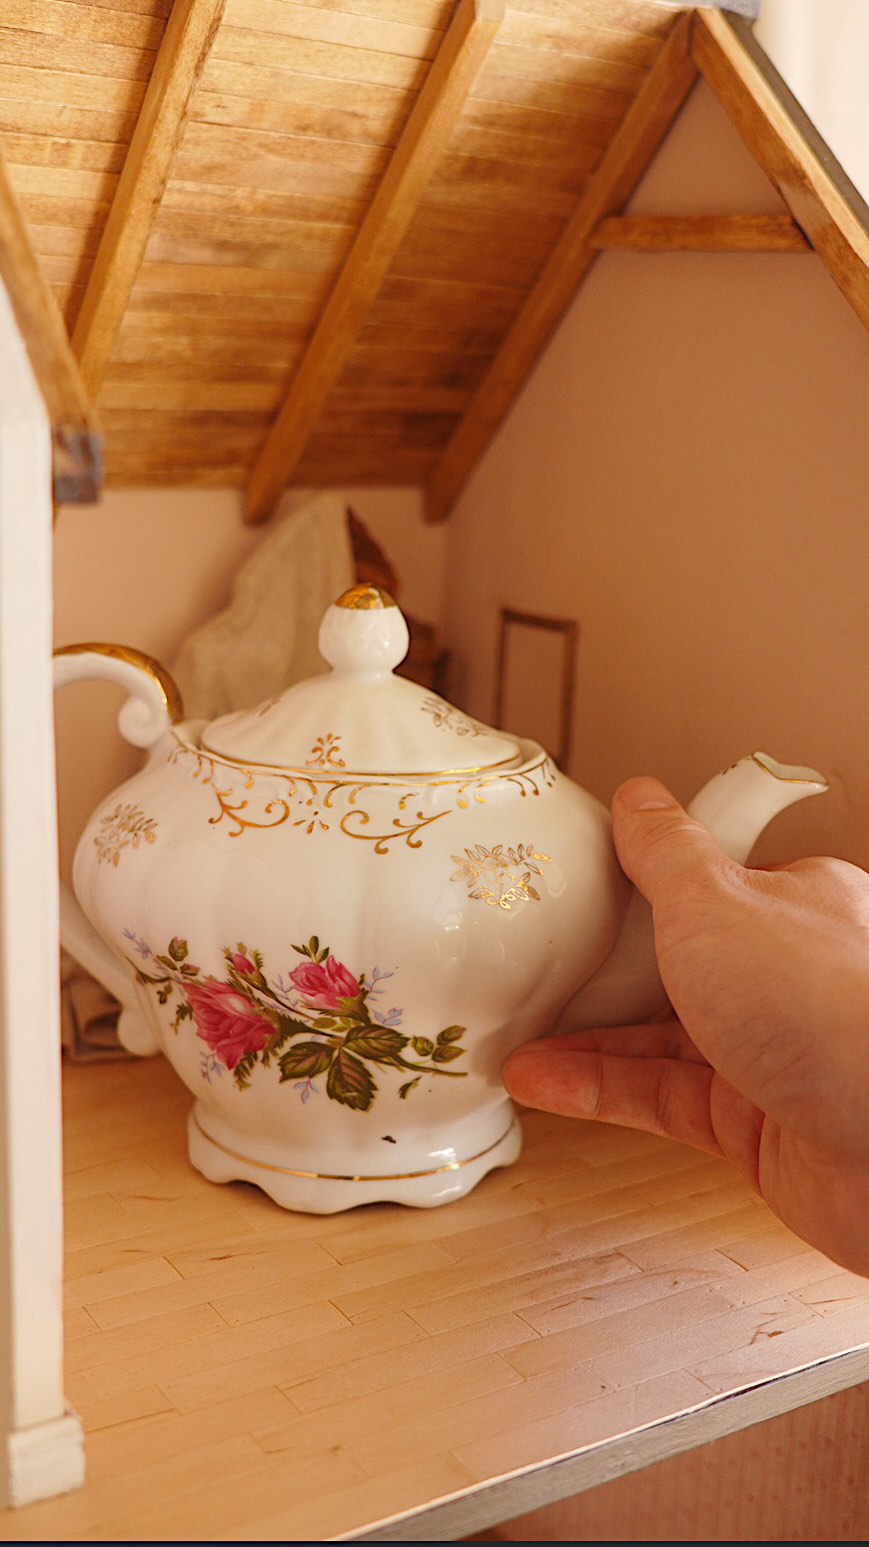
@kylewilliamdesign Part 2 of turning an old dollhouse into a bar cabinet I can’t afford! While the exterior was inspired by the nearly $10,000 Maitland-Smith Dollhouse Bar Cabinet, for the interior, I’m going full camp. I decided to start at the top with the simplest rooms and work my way down, going for the faded grandeur of an old English manor. I imagined one room as an old, forgotten attic, with plastered walls, exposed rafters, and antique furniture left under dust sheets. The other became a converted attic bedroom, with striped fabric I found at a garage sale years ago as wallpaper (interior designers have the best stuff!). After over 4 million people watched Part 1, you all made it VERY clear that I should go full camp. I quickly realized, though, that some of my ideas were slightly ahead of my skill set. Now, after hundreds of tiny floorboards, carved beams, paneled ceilings, and a lot of trial and error, I think I’m finally ready to tackle the more elaborate rooms downstairs. Shout out to @steveputnamdesign for the incredible floor tutorial! Next up: the second floor, where things are going to get a lot more elaborate. #miniature #dollhouse #diy #furnitureflip #design
View original on Instagram

The edit1 shot · 8 text
Shots Text1:31

Performance

Views
714.8K
Likes
70.2K
Comments
735
Engagement
9.9%
Outlier
23.6×
Length · 1 Oct 2026
1:31

Video #43776 · Vlog

DIY dollhouse renovation process videofrom @kylewilliamdesign

[01]

Overview

The creator documents the process of renovating the attic of a dollhouse bar cabinet. He explains his design choice, influenced by audience feedback, and then demonstrates the step-by-step process of plastering and painting walls, applying fabric as wallpaper, constructing custom wood ceilings with exposed rafters, and meticulously crafting hardwood floors from veneer strips. After showing the before-and-after transformation, he adds a small furniture vignette and asks for audience feedback while teasing the more ambitious next phase of the project.

[02]

Simple outline

  1. 1State ambitious goal
  2. 2Show meticulous process
  3. 3Reveal satisfying transformation
  4. 4Tease next challenge

[03]

Related videos

[04]

Classification

Format
Concepts
ProcessTutorial / How ToAudience-Sourced Decisions
Elements
VoiceoverB-Roll CutawayMontage EditingImage Overlay

[05]

Hook analysis

What stops the scroll in the first 3 seconds

Title hook · 52%

Welcome back to recreating a dollhouse bar cabinet I can't afford.

Verbal hook · 48%

Welcome back to recreating a dollhouse bar cabinet I can't afford.

Visual hook

A person raises their hand in a welcoming gesture, immediately followed by a quick cut to a close-up shot of a hand applying finish to the intricate wooden exterior of a dollhouse.

[07]

Hook and payoff

The promise the opener makes, and how the video pays it back

Hook

Re-establishes a high-stakes, relatable series premise that combines aspiration with limitation (e.g., 'recreating X that I can't afford').

Payoff

A cliffhanger that teases the next, even more ambitious phase of the project, creating an open loop that encourages viewers to follow for the next installment.

[08]

Narrative framework

The structural pattern this video runs on

Framework

The Aspirational Process

Documenting the challenging, step-by-step process of transforming something ordinary into something extraordinary, framed as an underdog story where the creator's ambition outpaces their current skill, thereby inviting the audience to root for their success.

  1. 1

    The Mandate

    The creator establishes the project's direction by referencing a decision made by the audience, creating immediate viewer investment and a sense of co-creation.

  2. 2

    The Vision Statement

    The creator outlines the ambitious aesthetic or conceptual goal, setting a high bar for success and showing inspiration to manage viewer expectations.

  3. 3

    The Humility Gambit

    The creator admits a skill gap or lack of experience and outlines a strategic, scaled approach to the project, positioning themselves as a relatable underdog and building narrative tension.

  4. 4

    The Process Gauntlet

    A montage of the most difficult, detailed, or time-consuming steps of the project. This section highlights specific challenges ('the hardest undertaking') and clever solutions to build respect for the craft and heighten the stakes for the final reveal.

  5. 5

    The Transformation Reveal

    A direct, visually satisfying 'before and after' comparison that provides the primary payoff for the preceding effort, often accompanied by a brief emotional reflection on the difficulty and satisfaction of the process.

  6. 6

    The Bonus Detail & Engagement Hook

    The creator showcases an extra, unexpected creative element and then immediately asks the audience for a specific opinion on it, directly prompting comments and further investment.

Themes

  • creativity
  • craftsmanship
  • upcycling
  • skill development
  • interior design

Techniques

  • miniature building
  • woodworking
  • painting
  • wallpapering

Trends

  • DIY project documentation
  • ASMR process
  • aesthetic vlogging

Post caption

Part 2 of turning an old dollhouse into a bar cabinet I can’t afford! While the exterior was inspired by the nearly $10,000 Maitland-Smith Dollhouse Bar Cabinet, for the interior, I’m going full camp. I decided to start at the top with the simplest rooms and work my way down, going for the faded grandeur of an old English manor. I imagined one room as an old, forgotten attic, with plastered walls, exposed rafters, and antique furniture left under dust sheets. The other became a converted attic bedroom, with striped fabric I found at a garage sale years ago as wallpaper (interior designers have the best stuff!). After over 4 million people watched Part 1, you all made it VERY clear that I should go full camp. I quickly realized, though, that some of my ideas were slightly ahead of my skill set. Now, after hundreds of tiny floorboards, carved beams, paneled ceilings, and a lot of trial and error, I think I’m finally ready to tackle the more elaborate rooms downstairs. Shout out to @steveputnamdesign for the incredible floor tutorial! Next up: the second floor, where things are going to get a lot more elaborate. #miniature #dollhouse #diy #furnitureflip #design
Text overlays

  • title · beginning

    Welcome back to recreating a dollhouse bar cabinet I can't afford.

  • informational · beginning

    It's time to start the inside To house my teacup collection.

  • informational · beginning

    My options were keeping it simple or going full camp.

  • informational · beginning

    I decided to go with the faded grandeur of an old English manor.

  • informational · middle

    The floors were the hardest undertaking.

  • informational · end

    all of that, took it from this to this.

  • call-to-action · end

    but let me know if you like it or you think it's too busy.

  • informational · end

    Next up is the second floor, where I'll be attempting more ambitious wall paneling and herringbone floors.

Transcript

Welcome back to recreating a dollhouse bar cabinet I can't afford. It's time to start the inside to house my teacup collection. My options were keeping it simple or going full camp. You made it very clear what I should do. For my design scheme, I decided to go with the faded grandeur of an old English manor. I've never done anything like this before, so I'm starting with the attic since it'll have the simplest design with the hope that my skills will grow to match my ambition by the time I make it to the 1st Floor. For the first room, I better the walls to give them texture, then painted them a dusty pink. For the other room, I used some fabric I found at a garage sale years ago as wallpaper. I did everything on cardstock because it was too tight to work in the rooms themselves. The sloped ceiling was a design challenge, so I decided to make a wood ceiling with exposed rafters. I carved the beams to make them look old and worn. I stained one of the ceilings to give it a weathered look and painted the other blue to complement the wallpaper. The floors were the hardest undertaking. I used beach veneer edging and ended up cutting hundreds of individual floorboards. Then I ironed them down in a staggered pattern. I even drilled tiny holes in the floorboards to mimic nails. I ended up loving the raw good, so I gave everything a clear polyurethane finish for protection. Finally, I painted and cut the baseboards for each room and assembled everything in the dollhouse. All of that took it from this to this. This was so much more work than I was anticipating, but I fell in love with the process. I also had the idea of adding a little vignette to each room, like this miniature whatnot shelf I draped and mod podge covered linen. But let me know if you like it or you think it's too busy. And next up is the 2nd Floor tier I'll be attempting more ambitious wall paneling and herringbone floors, but I'm so excited to hear how you think the attic turned out.

DIY dollhouse renovation process video | Viral Hooks