Viral Hooks
Trending short videosCrafting a book step-by-step
B

@blickartmaterials

Instagram 路 Vlog

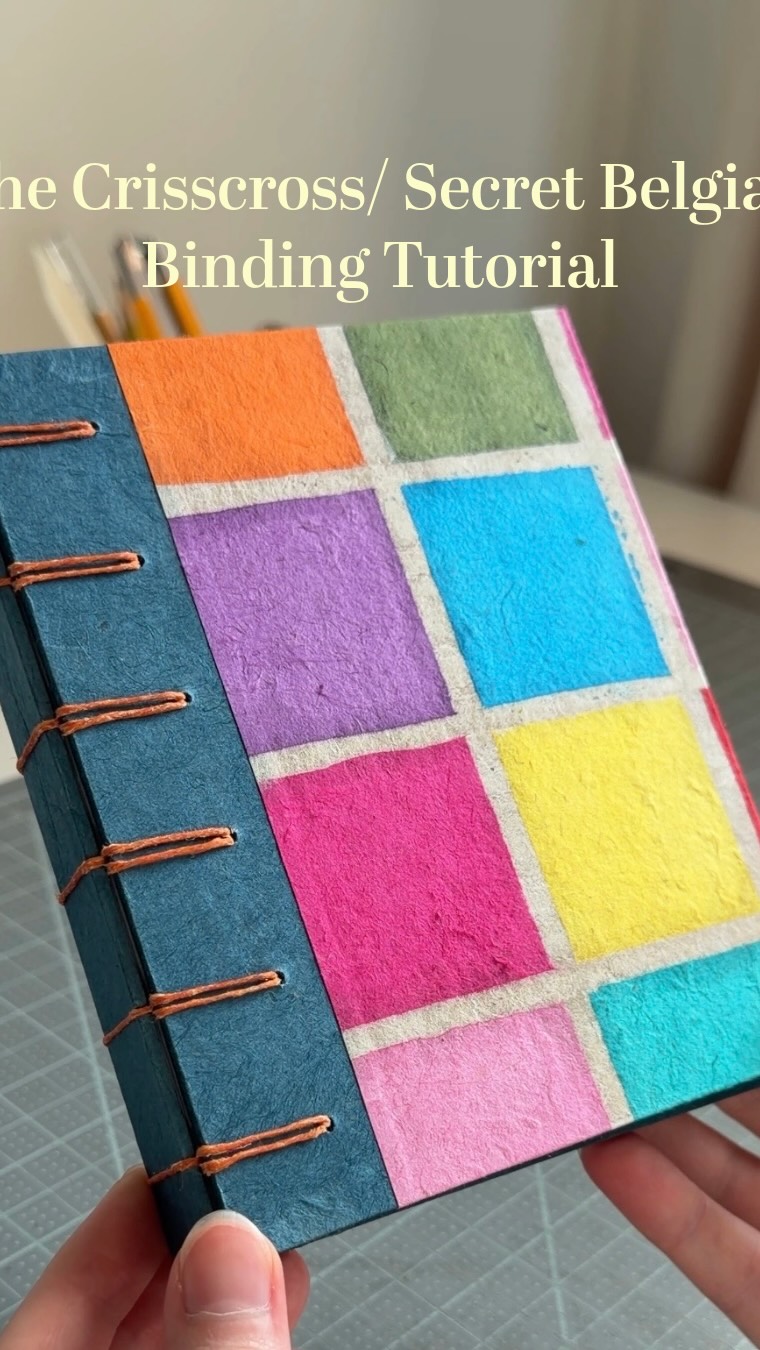
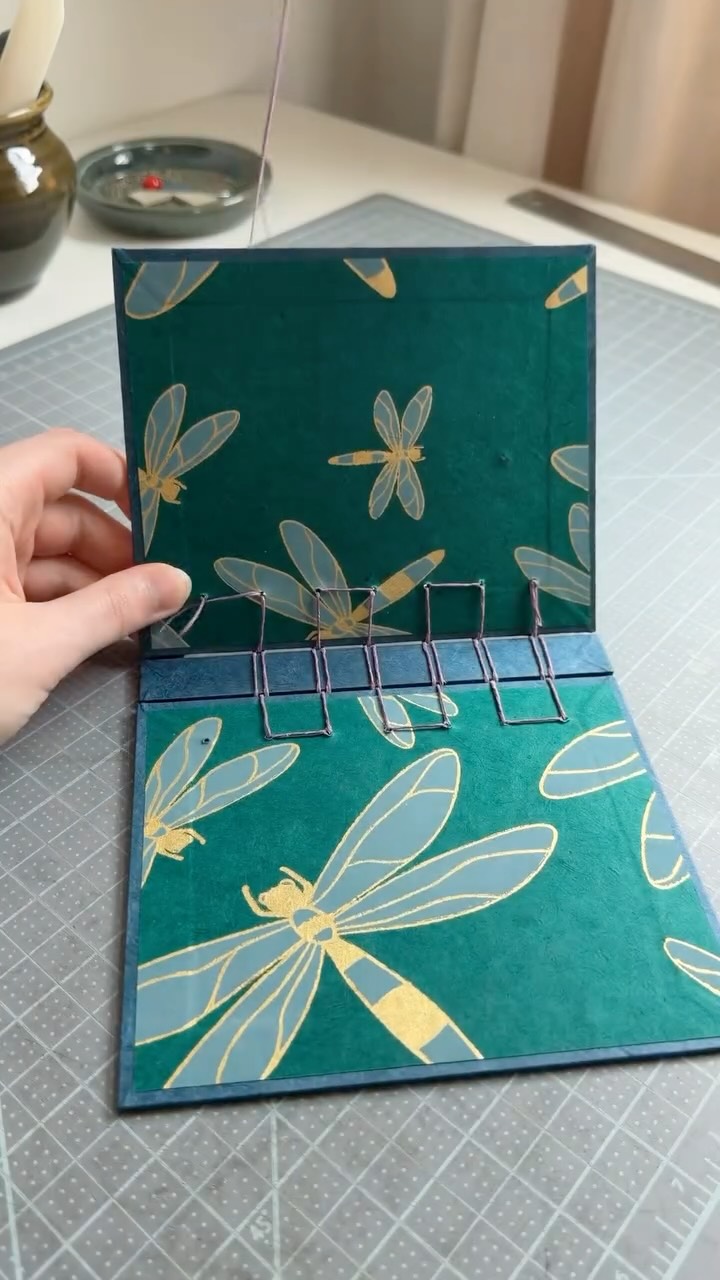
@blickartmaterials 馃摉Join Brinn of The Ernie Studio as she takes you step by step through the highly requested tutorial! This beautiful technique is the Crisscross Binding (often nicknamed the 'Secret Belgian Binding'), which was originally invented in 1985 by the talented Belgian bookbinder Anne Goy.馃 Comment BOOK, and we'll send you a DM with a link to the written instructions, plus a curated shopping list featuring all the supplies Brinn used in the tutorial! Artist: @the.ernie.studio Materials: Canson XL Mixed Media Pad - 11" x 14", Portrait, 60 Sheets, Lineco Paper Folder - 6" x 7/8", Small, Westcott Flexible Stainless Steel Ruler - 18", Flexible, Sewing Awl, Lineco Acid-Free Binder's Board - 15" x 20-1/2", 70 pt, Pkg of 4, Lamali Lokta Paper - 20" x 30", Storm Blue, Pink, & Batik, Colorful Squares, Blick General Purpose Masking Tape - Natural, 3/4" x 60 yds, Books By Hand Waxed Linen, Thread - Basic Pack, 20-yard Spools, Pkg of 3, Lineco Curved Bookbinding Needles - Pkg of 3, Olfa Ratchet-Lock Utility Knife, Lineco Neutral pH Adhesive - Quart, & Lineco Glue Brush - 3/4" Stitch Created by @anne_goy @cansonusa @lineco_up @westcottbrand @olfa_craft #bookbinding #tutorial #secretbelgian #howto
View original on Instagram

The edit1 shot 路 8 text
Shots Text2:00

Performance

Views
375.9K
Likes
26.4K
Comments
1.8K
Engagement
7.5%
Outlier
31.5脳
Length 路 5 Oct 2026
2:00

Video #44775 路 Vlog

Crafting a book step-by-stepfrom @blickartmaterials

[01]

Overview

The creator provides a complete, step-by-step visual tutorial on how to make a book using the Secret Belgian Binding method. They demonstrate preparing the materials, punching holes in the paper signatures and covers, assembling the cover pieces, and then meticulously sewing the covers and signatures together. The video concludes by showing the final steps of gluing the endpapers and pressing the finished book.

[02]

Simple outline

  1. 1Reveal final creation
  2. 2Prepare core components
  3. 3Execute signature technique
  4. 4Display completed structure

[03]

Related videos

[04]

Classification

Format
Concepts
Tutorial / How ToProcessSatisfying Process
Elements
Text OverlayOverhead ShotMontage EditingMood MusicTitle Text Hook

[05]

Hook analysis

What stops the scroll in the first 3 seconds

Title hook

Secret Belgian Binding Tutorial

Visual hook

The video opens with a close-up, angled shot of the finished, colorful book, showcasing the intricate orange stitching on the dark blue spine. This immediately presents the appealing final product to the viewer.

[07]

Hook and payoff

The promise the opener makes, and how the video pays it back

Hook

The Aspirational Outcome: A quick, dynamic showcase of the finished, high-quality result to establish the goal and hook the viewer with a sense of 'I want to be able to do that.'

Payoff

The Functional Result: A final presentation of the successfully completed object or core component, proving the technique works and providing a sense of accomplishment and closure for the viewer.

[08]

Narrative framework

The structural pattern this video runs on

Framework

The Mastery Transfer Blueprint

To demystify a complex skill by breaking it down into a visually satisfying, step-by-step demonstration, starting with the end result to create desire and ending with the completed core component to deliver knowledge.

  1. 1

    The Alchemist's Table

    A clear, organized presentation of all the raw materials and tools needed for the process. This manages viewer expectations and establishes the creator's expertise.

  2. 2

    Foundational Preparation

    A sequence showing the initial, critical steps of preparing the individual components before assembly, such as measuring and punching holes. Each action is shown clearly and methodically.

  3. 3

    The Assembly Phase

    The process of bringing the prepared components together to form the main structure, often held temporarily with an adhesive or clamp.

  4. 4

    The Signature Technique

    A detailed, close-up demonstration of the unique or most important technique that defines the process. This is the core knowledge transfer and the primary focus of the tutorial.

Themes

  • creativity
  • craftsmanship
  • skill-building
  • handmade goods

Techniques

  • bookbinding
  • sewing
  • paper crafts

Post caption

馃摉Join Brinn of The Ernie Studio as she takes you step by step through the highly requested tutorial! This beautiful technique is the Crisscross Binding (often nicknamed the 'Secret Belgian Binding'), which was originally invented in 1985 by the talented Belgian bookbinder Anne Goy.馃 Comment BOOK, and we'll send you a DM with a link to the written instructions, plus a curated shopping list featuring all the supplies Brinn used in the tutorial! Artist: @the.ernie.studio Materials: Canson XL Mixed Media Pad - 11" x 14", Portrait, 60 Sheets, Lineco Paper Folder - 6" x 7/8", Small, Westcott Flexible Stainless Steel Ruler - 18", Flexible, Sewing Awl, Lineco Acid-Free Binder's Board - 15" x 20-1/2", 70 pt, Pkg of 4, Lamali Lokta Paper - 20" x 30", Storm Blue, Pink, & Batik, Colorful Squares, Blick General Purpose Masking Tape - Natural, 3/4" x 60 yds, Books By Hand Waxed Linen, Thread - Basic Pack, 20-yard Spools, Pkg of 3, Lineco Curved Bookbinding Needles - Pkg of 3, Olfa Ratchet-Lock Utility Knife, Lineco Neutral pH Adhesive - Quart, & Lineco Glue Brush - 3/4" Stitch Created by @anne_goy @cansonusa @lineco_up @westcottbrand @olfa_craft #bookbinding #tutorial #secretbelgian #howto

Text overlays

  • title 路 beginning

    Secret Belgian Binding Tutorial

  • informational 路 beginning

    Punch holes with your awl at 0.5 in, 1.5 in, 2.5 in, 3.5 in, 4.5 in and 5.5 in.

  • informational 路 middle

    Line up your covers and spine, leave a 2mm or 1/16in gap between the cover and spine, tape the edges.

  • informational 路 middle

    Thread your needle and sew through the first hole from inside to outside, leave a 1-2 inch tail.

  • informational 路 middle

    Weave back through the cover and the spine. Sew through the gap around the spine and tie a knot with the tail. Tuck the tail under.

  • informational 路 middle

    Place your first signature on the cover. Sew from the inside of the signature through the first hole.

  • informational 路 end

    Sew under the first stitch of the first signature and tie a kettle stitch.

  • informational 路 end

    Glue the first and last page to the cover.