Viral Hooks
Trending short videosDIY gemstone stained glass door process
W

@want.zamora

Instagram · Vlog

@want.zamora Why didn’t I think of this sooner?! Let’s make gemstone stained glass. I used my Galaxy Tab S11 Ultra with Google Gemini to work through this project. The slim design and powerful performance make it a great tool for any project. Let me know what you think so far and stay tuned for part 2 @samsungmobileusa #SamsungPartner #PowerUpYourPassion Google and Gemini are trademarks of Google LLC. Check responses. Setup required. Compatibility and availability varies. 18+. Sequences shortened and simulated.

View original on Instagram

The edit1 shot · 1 text
Shots Text2:01

Performance

Views
2.4M
Likes
135.3K
Comments
381
Engagement
5.7%
Outlier
3.6×
Length · 27 Dec 2025
2:01

Video #19426 · Vlog

DIY gemstone stained glass door processfrom @want.zamora

[01]

Overview

The creator documents the step-by-step process of creating a renter-friendly gemstone stained glass window for his french doors. He integrates a Samsung tablet to source materials and sketch the design, then demonstrates the application of window film, gluing gems, and adding lead lines, concluding with a cliffhanger for part two.

[02]

Simple outline

  1. 1Pitch ambitious upgrade
  2. 2Establish creator authority
  3. 3Source unique materials
  4. 4Reveal accessible technique
  5. 5Tease unfinished result

[03]

Related videos

[04]

Classification

Format
Concepts
ProcessTutorial / How ToBrand Showcase
Elements
VoiceoverProduct PlacementMontage EditingPicture-in-Picture

[05]

Hook analysis

What stops the scroll in the first 3 seconds

Title hook · 35%

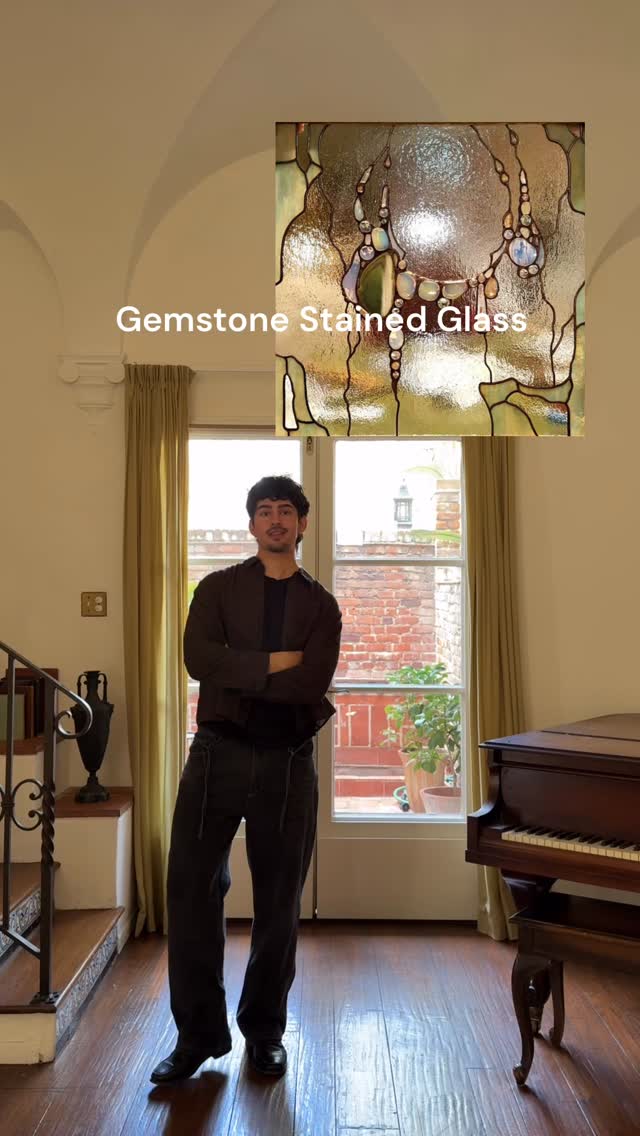
Gemstone Stained Glass

Verbal hook · 40%

Let's add gemstone stained glass to my front doors.

Visual hook · 25%

Creator standing in a well-lit room in front of french doors with a graphic overlay of a stained glass design appearing above his head.

[07]

Hook and payoff

The promise the opener makes, and how the video pays it back

Hook

The Visionary Pitch: Immediately visualizing the high-concept end goal in the specific location to create desire.

Payoff

The Suspense Bridge: Halting the process right before the final piece is added to guarantee return viewership for Part 2.

[08]

Narrative framework

The structural pattern this video runs on

Framework

The DIY Upgrade Saga

Elevating a familiar niche project by introducing a novel material element, anchored by an accessible 'hack' technique and a serialized cliffhanger.

  1. 1

    The Authority Bridge

    Briefly showcasing previous successful iterations of similar projects to establish competence and build trust.

  2. 2

    The Treasure Hunt

    Taking the viewer on the journey of sourcing the specific, unique materials needed for the upgrade.

  3. 3

    The Tech Assist

    Seamlessly integrating a tool or sponsor that aids in the planning or discovery phase of the project.

  4. 4

    The Accessibility Key

    Revealing the specific 'secret sauce' or technique (e.g., renter-friendly film) that makes the complex project achievable for the average viewer.

  5. 5

    The Discovery Moment

    Using the project to learn or teach a specific fact about the materials, adding educational value to the entertainment.

  6. 6

    The Texture Layering

    Improvising or adding a secondary element to increase the complexity and visual interest of the design.

Themes

  • Renter friendly decor
  • Creative DIY
  • Technology integration

Techniques

  • Voiceover
  • Montage
  • Product integration

Trends

  • Stained glass art
  • Renter friendly hacks

Post caption

Why didn’t I think of this sooner?! Let’s make gemstone stained glass. I used my Galaxy Tab S11 Ultra with Google Gemini to work through this project. The slim design and powerful performance make it a great tool for any project. Let me know what you think so far and stay tuned for part 2 @samsungmobileusa #SamsungPartner #PowerUpYourPassion Google and Gemini are trademarks of Google LLC. Check responses. Setup required. Compatibility and availability varies. 18+. Sequences shortened and simulated.

Text overlays

  • title · beginning

    Gemstone Stained Glass

Transcript

Let's add gemstone stained glass to my front doors. As you guys know, I love stained glass. I've actually added it to most of my apartments using a renter friendly technique that I found a few years ago. And today, I'm taking it to the next level and adding gemstone. This would look so good on these two French doors. They get the best lighting during sunset, which is gonna make the stained glass and the gems just shine. First things first was finding some gems. I googled Gemini. I'm looking for small gemstones. What are the best stores to find them in LA? Better I got some recommendations, I picked the store that was closest to me and headed to a shop in Downtown LA. And this store had everything. There were all sorts of crystals and gems, literally anything you could think of. After searching through buckets of gems, I found the perfect stones. I wanted the palette to be iridescent with some warm and cool tone gems, and worst importantly, translucent so that the sun rank shine through. Before starting, I wanted to sketch out my design, so I used my galaxy tab s 11 ultra to sketch out the placement. And once that was done, it was time to hang up the gems. I knew I needed to glue the gems to the window, so I had the idea of using clear window film to attach the gems onto. That way, everything is renter friendly. To attach the film, you just spray water on it and on the window, and then slide it into place. I sprayed the gems with this adhesive and then individually stuck each one to the film. I was really curious what this gem was, so I took a photo of it and asked Gemini to identify it. I learned that this is actually a sliced agate and that it usually comes in earthy color tones. I thought that this privacy screen kind of resembled stained glass, so I decided to add it to the design to add different glass textures. Once it was up, it was time to add the liquid stained glass. This is the technique that I've done before, so I'm quite used to installing it. I first placed the faux lead lines and then filled it in with the clear liquid paint. I used a fork to give it a rippled glass like texture. I actually have this beautiful piece of stained glass, which I'm thinking of incorporating. But before that happens, I need to let this dry, so stay tuned for part two.