Viral Hooks
Trending short videosStep-by-step pants repair tutorial
C

@crust_young

TikTok 路 Vlog

@crust_young How to repair a rip on pants 馃У馃 While it may seem daunting, the steps are ultimately simple: - Trim around the hole to get rid of frayed edges - Cut your patch to size - Sew around the edge of your patch to create a strong base stitch - Tuck in and iron the raw edges of the hole - Sew a whip stitch around the entirety of the hole to finalize the repair All in all, this repair took me about 45 minutes to do! Both sewing and serging machines were Singer heavy duty. #upcycling #visiblemending #denimrepair #sewing #patchwork

View original on TikTok

The edit1 shot 路 1 text
Shots Text1:23

Performance

Views
294.1K
Likes
15.1K
Comments
23
Engagement
5.1%
Outlier
2脳
Length 路 12 Jun 2025
1:23

Video #8828 路 Vlog

Step-by-step pants repair tutorialfrom @crust_young

[01]

Overview

The creator provides a detailed, step-by-step tutorial on how to repair a large rip in a pair of pants. He begins by cleaning the frayed edges of the hole, then cuts and prepares a fabric patch by serging its edges. He demonstrates how to pin and sew the patch onto the inside of the pants with a sewing machine, then shows how to fold and iron the raw edges of the original hole before finishing the repair by hand with a whip stitch.

[02]

Simple outline

  1. 1State relatable problem
  2. 2Detail methodical process
  3. 3Address potential failure
  4. 4Show final transformation

[03]

Related videos

[04]

Classification

Format
Concepts
Tutorial / How ToProcess
Elements
VoiceoverB-Roll CutawayImage Overlay
Topics

[05]

Hook analysis

What stops the scroll in the first 3 seconds

Title hook 路 45%

MY FRIEND RIPPED HIS PANTS.

Verbal hook 路 30%

My friend ripped his pants, so let's do a repair on them.

Visual hook 路 25%

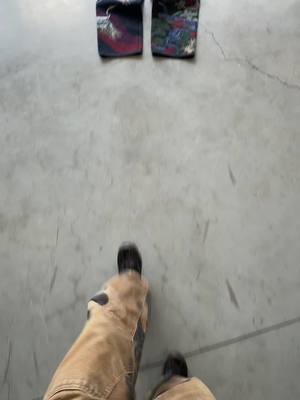
The creator holds up a pair of camouflage pants, prominently displaying a large, frayed rip near the back pocket, immediately establishing the video's problem and purpose.

[07]

Hook and payoff

The promise the opener makes, and how the video pays it back

Hook

Introduce a common, tangible problem and promise a step-by-step solution, immediately establishing the video's value proposition.

Payoff

Present the 'before and after' transformation, showcasing the successfully resolved problem and delivering a satisfying sense of completion and accomplishment.

[08]

Narrative framework

The structural pattern this video runs on

Framework

The Competence Builder

A process-driven tutorial that breaks down a complex task into a series of manageable, visually satisfying steps, building viewer confidence and providing a clear, tangible outcome.

  1. 1

    The Triage

    Isolate and prepare the problem area, removing extraneous elements to create a clean slate for the solution.

  2. 2

    The Custom Solution

    Create the primary tool or element needed for the fix, tailoring it specifically to the problem at hand.

  3. 3

    The Proactive Reinforcement

    Perform a preliminary step that prevents future degradation or failure, demonstrating foresight and expertise.

  4. 4

    The Internal Scaffolding

    Apply the solution from a non-obvious angle (e.g., from the inside out), establishing the foundational structure of the repair.

  5. 5

    The Structural Lock-In

    Use a primary tool or technique to permanently affix the solution, creating the main structural bond.

  6. 6

    The Honest Complication

    Acknowledge and solve a tricky or imperfect part of the process, building authenticity and managing viewer expectations for real-world application.

  7. 7

    The Edge Taming

    Perform a cosmetic or refining step that cleans up the appearance of the repair, transitioning from structural to aesthetic focus.

  8. 8

    The Finishing Touch

    Apply a final, often manual, technique that secures all elements and completes the aesthetic, showcasing craftsmanship.

  9. 9

    The Clarity Break

    Pause the action to provide a static, highly-legible visual aid that clarifies a complex or hard-to-see technique, ensuring the educational goal is met.

Themes

  • Sustainability
  • Craftsmanship
  • Practical skills
  • Resourcefulness

Techniques

  • Machine sewing
  • Hand sewing (whip stitch)
  • Serging
  • Patching

Trends

  • Visible mending
  • Upcycling clothing

Post caption

How to repair a rip on pants 馃У馃 While it may seem daunting, the steps are ultimately simple: - Trim around the hole to get rid of frayed edges - Cut your patch to size - Sew around the edge of your patch to create a strong base stitch - Tuck in and iron the raw edges of the hole - Sew a whip stitch around the entirety of the hole to finalize the repair All in all, this repair took me about 45 minutes to do! Both sewing and serging machines were Singer heavy duty. #upcycling #visiblemending #denimrepair #sewing #patchwork

Text overlays

  • informational 路 end

    AWESOME PICTURE AS A FREEZE FRAME

Transcript

My friend ripped his pants, so let's do a repair on them. The first thing you're gonna wanna do is clean up the rip. Remove all the frayed edges around the hole. Once that's done, we're gonna get the patch ready. I'm using this old HBT fabric and just cutting it to size around the hole. You want it to be a large enough base that it covers the hole and surrounding area no it doesn't continue to rip. But you don't want it to be too big no it's uncomfortable to wear. Once my patch is cut, I'm gonna go in and search the edges no it doesn't continue to fray on the inside of the pants. And with the pants flipped to the inside, I'm gonna place and pin my patch. Make sure you're getting that as smooth and crisp as possible. And then, I'm just gonna take it over to my machine and sew around the outside of the patch. Now, this area is a little bit wonky. You can see where I sewed and I did have to tack down a little bit of the corner of the pocket to give it some more rank. Better, ultimately, there's still a lot of room to put a wallet or a phone in there. Now, once the base of the patch is sewn into place, I'm gonna go in with my iron and try to fold in those raw edges of the hole. Some spots spots can be really tricky, so just do the best you can and try to pin that into place. The final step is to go in with a needle and a thread and do a whip stitch around the entire hole of the patch. It's a really easy stitch where you go up through the patch patch and the pants and then down and around through the patch to make a loop. If you can't see it great here because of the thread and the camo, this is an awesome picture that you can use as a freeze frame. And once you've gone around in a full circle, just tie off a knot, and then your pants are done and repaired.